Unit 5: Homework
Displacement Maps
Directions
1. Open in photoshop original image you wish to bend the texture to in layer 1.
2. Open the image you want to displace in another layer (layer 2) and place it where you would like.
3. Turn off layer 2, open the history tab, and then select the button that looks like a camera with a plus sign over it, which will create a duplicate of your original image.
4. In the copy, go to Image, Adjustments, then Desaturate, so the image is in black and white.
5. Save it as "Displacement" and close the copy.
6. Then, with layer 1 selected and layer 2 visible, go to Filter, Distort, and then Displace. When it asks you to choose a file, select the file you named "Displacement."
7. Then, under the Normal tab on Layers, select Overlay instead to create a more realistic look. You can also change the opacity to your preference.
8. If there is any area on the image you would not like panted, create a layer mask over layer 1, and paint away the areas with the Paintbrush tool.
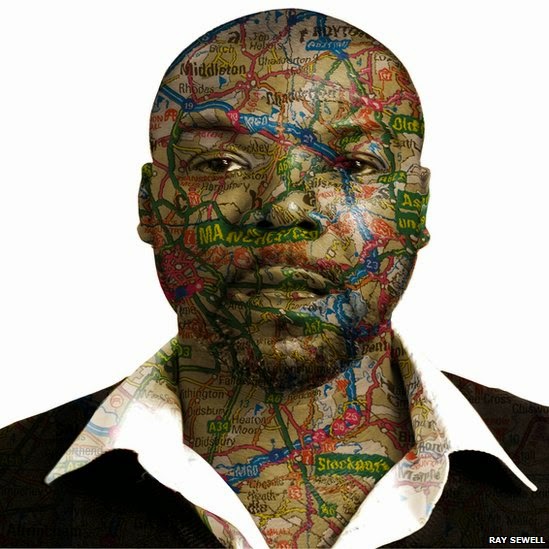
Example Images
 Pic #1: http://www.discoverdigitalphotography.com/2012/photoshop-tutorial-how-to-apply-a-texture-to-a-face-by-using-a-displacement-map/
Pic #2: http://chixthatklik.wordpress.com/2012/11/10/displacement-maps/
Pic #3: http://www.bbc.com/news/in-pictures-21335463
Pic #4: http://www.photoshopessentials.com/photo-effects/water-reflection/
Pic #1: http://www.discoverdigitalphotography.com/2012/photoshop-tutorial-how-to-apply-a-texture-to-a-face-by-using-a-displacement-map/
Pic #2: http://chixthatklik.wordpress.com/2012/11/10/displacement-maps/
Pic #3: http://www.bbc.com/news/in-pictures-21335463
Pic #4: http://www.photoshopessentials.com/photo-effects/water-reflection/


